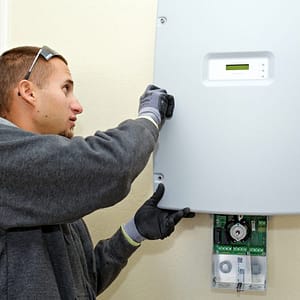
The first step to diagnosing any problem with your solar system is to complete a hard reset. This is usually done if the inverter (AKA the brain of your system) is showing a red or yellow light. Read below for step-by-step instructions on how to reset your solar system.
Step 1: Turn off your inverter
Locate your inverter (it is usually in the garage or on an exterior wall) and lift open the bottom panel. Find the AC/DC toggle switch and power down your inverter.
Step 2: Turn off your AC disconnect
This may or may not apply to you. If you have an AC disconnect in your garage (it would be a gray box with a black or red handle), turn this off.
Step 3: Turn off your solar disconnect box
Next to or below your solar meter there is a gray utility disconnect box with a black or red handle. Turn this off. Caution: May make a loud popping sound.
Step 4: Turn off your electrical service panel
Turn off the main breaker(s) on your electrical service panel. It will be labeled “Photovoltaic”.
Step 5: Wait 30 seconds
After waiting 30 seconds, we will turn everything back on in reverse order.
Step 6: Turn on your electrical service panel
Turn on the main breaker(s) on your electrical service panel. It will be labeled “Photovoltaic”.
Step 7: Turn on your solar disconnect box
Next to or below your solar meter, there is a gray utility disconnect box with a black or red handle. Turn this back on. Caution: May make a loud popping sound.
Step 8: Turn on your AC disconnect
This may or may not apply to you. If you have an AC disconnect in your garage (it would be a gray box with a black or red handle), turn this on.
Step 9: Turn on your inverter
Locate your inverter (it is usually in the garage or on an exterior wall) and lift open the bottom panel. Find the AC/DC toggle switch and power on your system.
The system can take anywhere from a few minutes to a full 30 minutes to completely start back up. If there is still a problem, click here to complete a service request form or continue onto the next question in your self-service form.


